Brother PT-D210 User Manual
This comprehensive user manual will guide you through all aspects of using your Brother PT-D210 label maker, from setting it up to creating and customizing labels․ Learn about its key features, how to troubleshoot common issues, and how to reset its internal memory․ This guide will help you maximize your label-making experience․
Introduction
Welcome to the world of easy and efficient label creation with the Brother PT-D210! This compact and user-friendly label maker is perfect for a variety of home and office needs, from organizing your workspace to creating custom labels for your belongings․ The PT-D210 offers a range of features designed to make label printing a breeze, including multiple font styles, 27 user-friendly templates, and a built-in cutter for precise label trimming․ This manual will serve as your guide to navigating the PT-D210’s capabilities and unlocking its full potential․ Get ready to unleash your creativity and streamline your labeling tasks with the Brother PT-D210․
Key Features
The Brother PT-D210 label maker is packed with features that make it a versatile and convenient tool for various labeling needs․ Its compact design and lightweight construction allow for easy portability, making it ideal for both home and office use․ The PT-D210 boasts a clear LCD display for easy navigation and previewing labels before printing․ It also features a range of font styles, sizes, and symbols to customize your labels to your liking․ The included tape cassette allows for printing labels in various widths, accommodating different labeling requirements․ The PT-D210 also includes a built-in cutter for precise label trimming, ensuring clean and professional-looking results․ With its user-friendly interface and array of features, the Brother PT-D210 makes label creation a simple and enjoyable experience․
Setting Up Your PT-D210
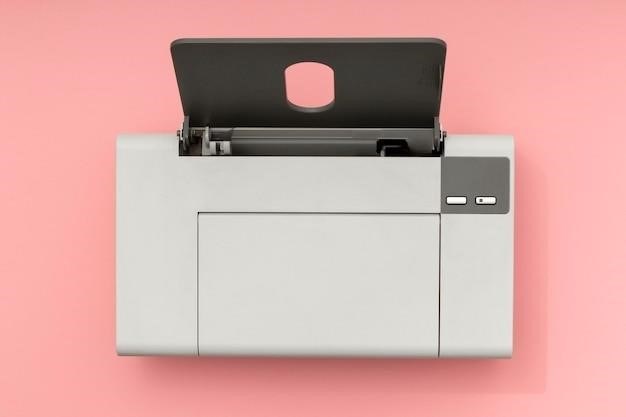
Setting up your Brother PT-D210 is a straightforward process․ Begin by unpacking the label maker and its accessories, including the instruction manual, tape cassette, and power adapter․ Locate the battery compartment and insert six AAA batteries or connect the power adapter to the device․ Once powered on, the PT-D210 will display a welcome screen and guide you through the initial setup process․ You may need to select your preferred language and adjust the date and time settings․ Finally, insert the tape cassette into the designated slot, ensuring it clicks into place․ With these steps completed, your PT-D210 is ready to start creating labels․
Creating Labels
The Brother PT-D210 makes label creation a breeze․ To begin, simply press the power button and select your desired label length by adjusting the settings on the device․ Next, you can choose from a range of font styles, sizes, and designs using the intuitive keypad and display․ To add text, press the corresponding keys on the keypad and navigate the cursor using the arrow keys․ The PT-D210 also offers a selection of pre-designed templates for common label types, such as address labels, file labels, and electrical labels․ These templates streamline the process, saving time and effort․ You can personalize your labels further by adding various symbols, graphics, and borders from the extensive library available on the device․ Once your label is designed, press the print button, and the PT-D210 will create your custom label with ease․
Entering Text
The Brother PT-D210 simplifies entering text for your labels․ The intuitive keypad allows you to easily input letters, numbers, and symbols․ The display provides a clear view of the text as you type, enabling you to make corrections or adjustments as needed․ The cursor can be moved using the arrow keys, allowing you to navigate within the text and insert characters at specific positions․ To capitalize letters, simply press the “SHIFT” key followed by the desired letter․ The PT-D210 also features a dedicated “SPACE” key for adding spaces between words․ For greater control over text placement, you can use the “TAB” key to indent text, creating a more organized and visually appealing label․ The PT-D210’s user-friendly interface makes entering text a straightforward and efficient process, ensuring you can easily create clear and concise labels․
Using Templates
The Brother PT-D210 offers a variety of pre-designed templates to streamline label creation․ These templates provide ready-made formats for various label types, such as file folders, electrical cords, and more․ To access the templates, simply press the “TEMPLATE” button on the label maker․ You can then scroll through the available options using the arrow keys․ Each template displays a preview of the label design, allowing you to select the one that best suits your needs․ The PT-D210’s templates are designed to save you time and effort, eliminating the need to manually create layouts from scratch․ Simply select the template you want to use and then personalize it with your own text, symbols, and graphics․ This feature simplifies label creation, making it quick and easy to produce professional-looking labels for various applications․
Adding Symbols and Graphics
The Brother PT-D210 label maker allows you to enhance your labels with a variety of symbols and graphics, adding a visual element to your creations․ To access the symbol library, simply press the “SYMBOL” button on the label maker․ You’ll be presented with a wide range of symbols, categorized by type, such as arrows, shapes, and punctuation marks․ Use the arrow keys to navigate through the library and select the desired symbols․ To add graphics, press the “GRAPHICS” button․ You can choose from a selection of pre-designed graphics, including icons, borders, and decorative elements․ Once you’ve selected your desired symbols and graphics, they will be displayed on the label preview screen․ You can then adjust their placement and size using the arrow keys and “SIZE” button․ This ability to add symbols and graphics allows you to create more personalized and informative labels, adding a touch of creativity and visual appeal to your work․
Customizing Labels
The Brother PT-D210 offers a range of customization options to create labels that perfectly suit your needs․ You can tailor the appearance of your labels by adjusting font styles, label length and width, and even the type of tape used; Experiment with different font styles to achieve the desired look for your labels․ The PT-D210 provides a selection of fonts, ranging from basic to decorative, allowing you to choose the best fit for your project․ You can easily modify the length and width of your labels to accommodate various applications․ The PT-D210 allows you to print labels in multiple widths, ensuring you can create labels that fit your specific needs․ Finally, the choice of tape is crucial for the overall appearance and durability of your labels․ The PT-D210 supports a variety of tape types, each with different colors, finishes, and resistance levels, allowing you to choose the best tape for your labeling project․

Font Styles
The Brother PT-D210 offers a variety of font styles to personalize your labels and make them visually appealing․ You can choose from a selection of fonts, including both basic and decorative options, to match the style of your project․ For a clean and professional look, opt for the standard font options․ These fonts are typically sans-serif and easy to read, making them ideal for labels that need to convey information clearly․ For a more creative and eye-catching approach, explore the decorative font styles․ These fonts often have unique flourishes and embellishments, adding a touch of personality to your labels; The PT-D210 also allows you to adjust the font size, enabling you to create labels that are easy to read from a distance or fit small spaces․
Label Length and Width
The Brother PT-D210 allows you to customize the length and width of your labels to suit your specific needs․ The label maker has a built-in cutter that allows you to create labels of various lengths, ensuring you can use the right size for your project․ You can choose from pre-set length options or set a custom length to fit your specific requirements․ For example, you can create short labels for small items or longer labels for larger objects․ The PT-D210 supports various tape widths, allowing you to create labels that are wide enough to accommodate longer text or larger graphics․ Whether you need a slim label for a small wire or a wider one for a file folder, the PT-D210 offers the flexibility to create labels that fit your needs․
Tape Type
The Brother PT-D210 offers a variety of tape types to choose from, ensuring you have the perfect label for any occasion․ The most common type is TZe tape, which comes in a range of widths and colors, including white, black, yellow, red, green, blue, and clear․ TZe tapes are durable and resistant to water, fading, and chemicals, making them ideal for indoor and outdoor use․ You can choose from different label finishes, including matte, glossy, and laminated, to suit your specific needs․ For example, a glossy finish might be preferred for labels that need to be eye-catching, while a matte finish is better for labels that need to blend in with their surroundings․ The PT-D210 also supports specialty tapes, such as heat-shrinkable tubes and iron-on tapes, which can be used for various applications․ These tapes offer additional functionalities, such as heat resistance and adhesion to different surfaces, allowing you to create labels for specific purposes․
Troubleshooting
While the Brother PT-D210 is designed for reliable operation, you may encounter occasional issues․ Here are some common problems and their solutions⁚
- Label not printing correctly⁚ Check if the tape is properly inserted and the tape type is selected correctly․ Ensure the print head is clean and free from debris․ Try a different tape cartridge if necessary․
- Label cutting issues⁚ Make sure the tape is properly inserted and the cutter is clean․ If the problem persists, you may need to adjust the cutter settings or contact Brother support․
- Label jams⁚ Gently remove the jammed label from the tape path․ Ensure the tape is properly inserted and the tape path is clear of any obstructions․
- Label not adhering properly⁚ Ensure the surface is clean and dry․ Use a stronger adhesive tape if necessary․
- Battery problems⁚ Replace weak or faulty batteries․ Consider using rechargeable batteries for prolonged use․
If you are still experiencing issues, refer to the detailed troubleshooting section in the user manual or contact Brother support for further assistance․
Resetting the Internal Memory
Resetting the internal memory of your PT-D210 is a useful tool for various situations, including clearing all saved label files or resolving operational issues․ Here’s how to perform a reset⁚
- Power off the PT-D210․
- Press and hold the Shift key and the R key simultaneously․
- Press and hold the Power key to turn the PT-D210 back on․
- Release the Shift and R keys․
The labeler will now be reset, and all saved label files will be erased․ Note that this action is irreversible, so ensure you have backed up any important label designs before proceeding․ If you’re unsure about the process, consult the detailed instructions in your PT-D210 user manual or contact Brother support for further guidance․
Contacting Brother Support
If you encounter any issues with your Brother PT-D210 or require assistance with specific features, Brother offers comprehensive support resources․ You can access their support website, which provides a wealth of information, including FAQs, troubleshooting guides, and downloadable manuals․ If you prefer direct assistance, Brother offers a variety of contact options, including phone support, email inquiries, and live chat․ Their dedicated support team is available to answer your questions and provide tailored solutions․ For urgent matters or complex troubleshooting, contacting Brother support is the most efficient way to resolve your concerns․
Additional Resources
Beyond the official Brother website, various online resources offer valuable insights and support for the PT-D210․ Numerous user forums and communities dedicated to Brother label makers provide a platform for sharing experiences, troubleshooting tips, and creative label ideas․ These communities can be a treasure trove of information, particularly for addressing specific challenges or discovering unique applications for your PT-D210․ Additionally, several independent websites offer detailed reviews, comparisons with other label makers, and comprehensive guides on using the PT-D210 effectively․ These external resources can complement the official documentation and broaden your understanding of the PT-D210’s capabilities․